7.0 Scheduling
7.1 Student Schedule
This page allows you to modify a student’s course schedule. To modify a group of students course schedule please use Group Schedule
To add a course to a student’s schedule
- You must first select a student by using the “Find a Student” search screen.
- You can search for students who have requested a specific course or request by clicking on the “Choose” link next to the search options “Course” and “Request” respectively and choosing a course from the popup window that appears.
- To add a course to the student’s schedule, click on the “Add a Course” link next to the add icon
 and select a course from the popup window that appears.
 - The screen will automatically refresh to show the course addition.
7.2 View Schedule
This tab allows you to view the entire schedule of a student. After you click on View Schedule, hapasis gives you a search box. Here you will have to perform a search with proper criteria. You will get a list of students as per your search criteria. Eg : if you select 1VA in “Class/Form” selection box you will get the list of all the students in 1VA. Then you click on any students’ name you will get a chart where you can get to see his/ her schedules. Here you get many filters to narrow down your search. Like : Date, Marking Period(if you select the marking period as Full Year it will give you the list of schedules for the full year. If you select Term1 you will only get the schedules of Term1), Calendar View.
In the period List you get the following details like Period Time, Course Name, Period Teacher, Room Name and the Term. At the bottom left corner you will get a Print Schedule option to take a print out of the schedules.
7.3 Student Requests
This utility allows you to add a schedule to a group of students in one action.
To schedule courses for students (Group Scheduling)
- Click on the “Scheduling” tab from the main-menu

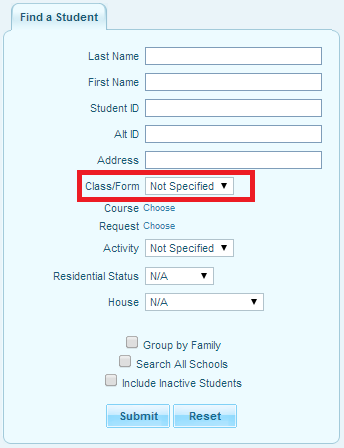
2. Click on “Group Schedule” from the sub-menu, the program will automatically refresh with the new “Find a Student” field in the workspace

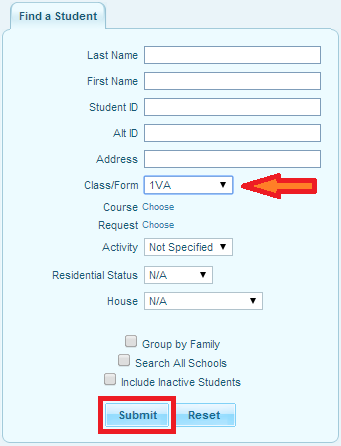
3. Choose/Select the class you want to schedule courses for from the “Class/Form” drop-down in the “Find a Student” field in the workspace.
4. Click on “Submit” button to load the students.
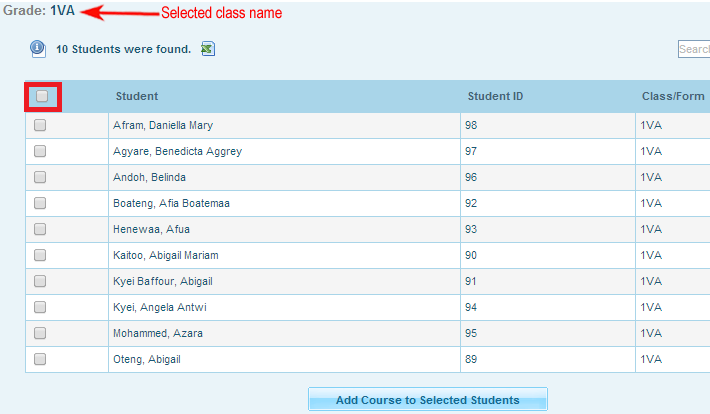
5. Select all the students by selecting or checking the first check box in the header row.
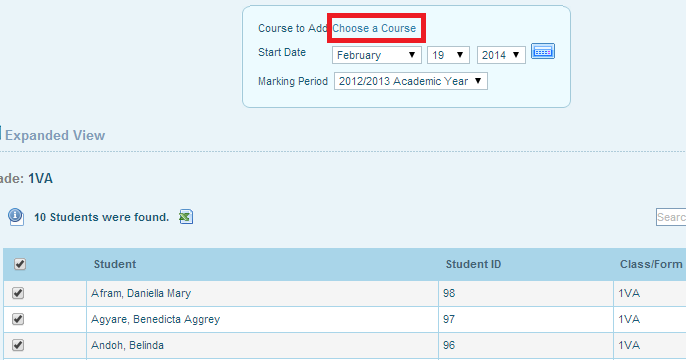
6. Choose a course to schedule for students by clicking on the “Choose a Course” link in the field above students list.
7. On clicking “Choose a Course” the program will automatically open new pop-up window containing programmes offered in the school.
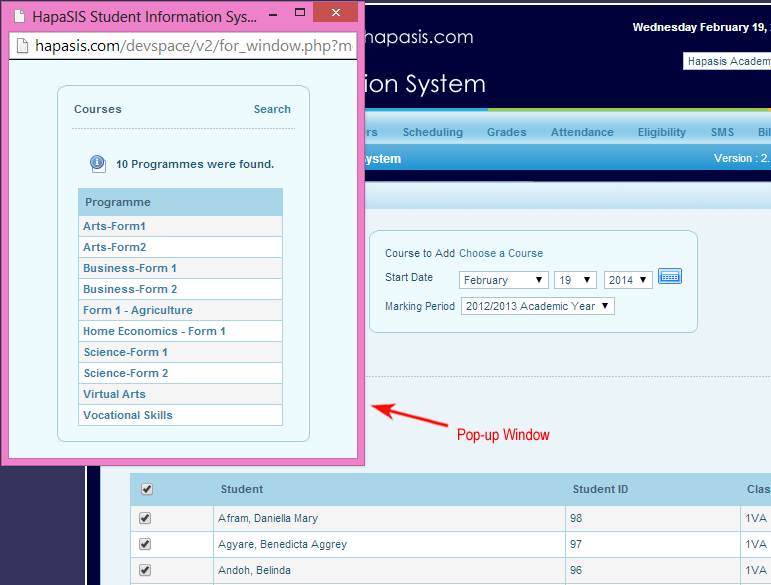
8. Click on the programme for the selected students. (see pop-up image above)
9. Now you can select the courses you want to schedule for students. You may select all the courses by selecting or checking the first check box in the header row.
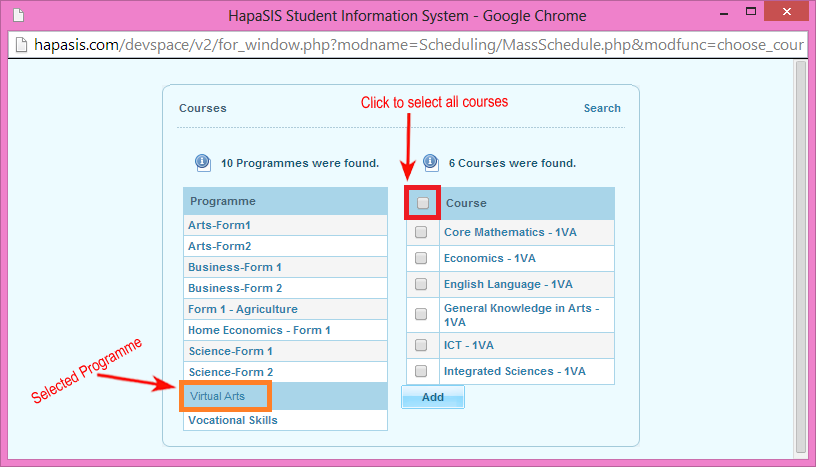
Note: Visual Arts programme is used in our example
10. Click on “Add” button to add the selected courses.
11. Select or check all the periods of the courses you have added
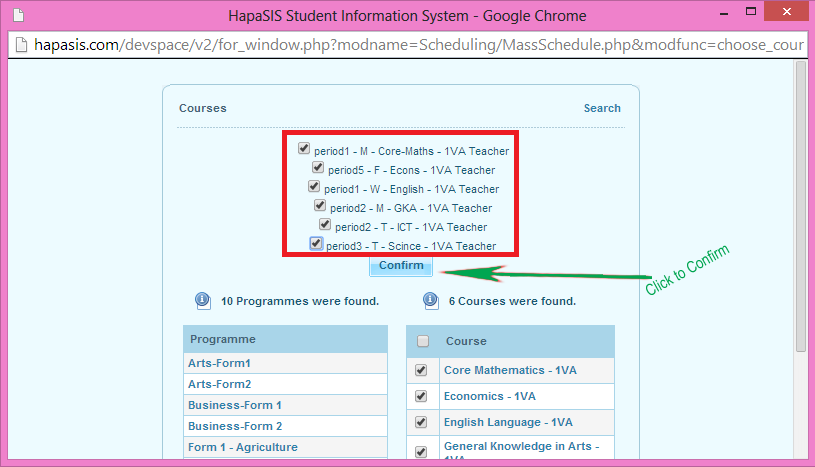
12. Click “Confirm” to finally add the courses and its periods. (see image above)
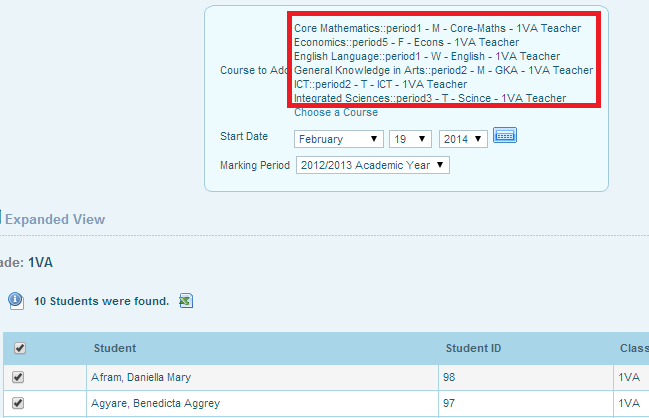
13. On clicking “Confirm” the window will disappear. The courses and its periods you have added now appear at the top in the main working window.
14. Scroll down to the bottom of the page and click on “Add Course to Selected Students”
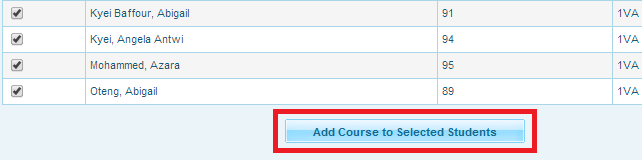
15. A confirmation screen will be shown telling you courses has been added to selected students successfully.

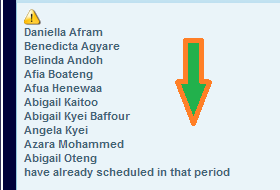
Note: If a course has already been scheduled for a student, the scheduler will skip that student and proceed to schedule for the rest of the students. (See image below)
7.5 Group Requests
7.6 Group Drops
This utility allows you to add a remove a group of students from a schedule in one action.
To Drop scheduled courses for students (Group Drops)
This utility allows you to remove a student or group of students from a schedule in one action.
- Click on the “Scheduling” tab from the main-menu
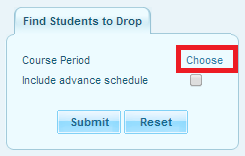
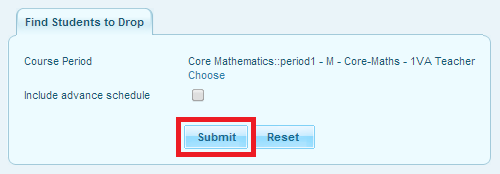
2. Click on “Group Drop” from the sub-menu that appears, the program will automatically refresh with the new “Find Students to Drop” field in the workspace

3. Select a course to be removed by clicking the “Choose” link at the top of the screen from the “Find Students to Drop” field in the workspace.
4. On clicking “Choose” the program will automatically open new popup screen containing programmes offered in the school.
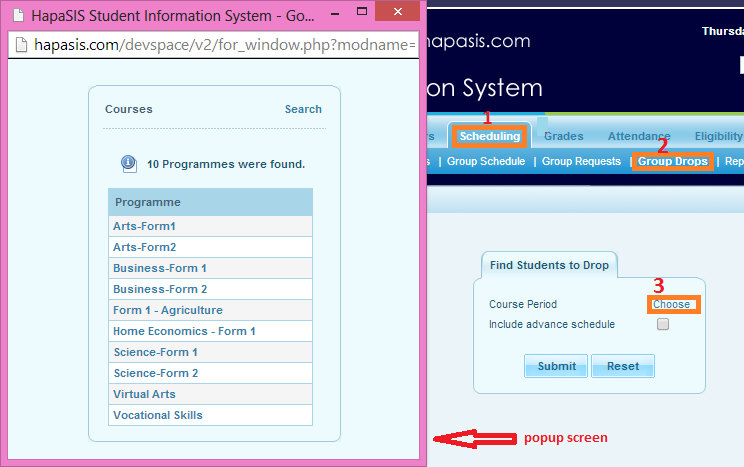
5. Click on the “Programme” you want to drop students from the popup screen that appears. (See image below)
6. Now you can select the course(s) in which you want to remove the students. Note: You may select multiple courses in which you want to remove the students.
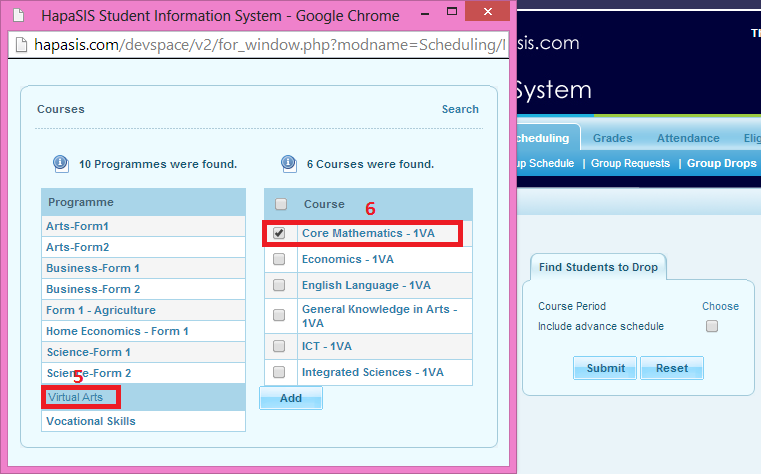
Note: Visual Arts programme and Core Mathematics are used in our example
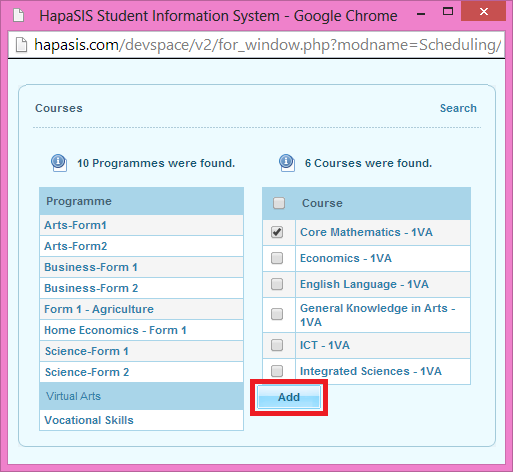
7. Click on “Add” button to add the selected course(s).
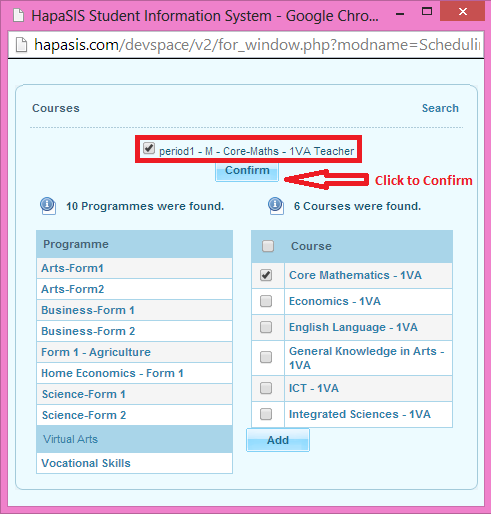
8. Select or check the period(s) of the course(s) you have added and click “Confirm” to finally add the course(s) and its period(s).
9. On clicking “Confirm” the popup screen will disappear. The course(s) and its period(s) you have added now appear at the top in the main working window.
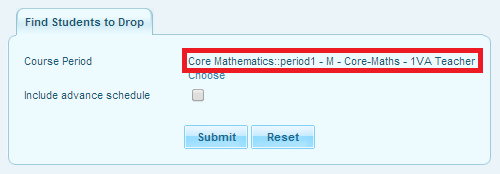
10. Click on “Submit” button to load the students you want to remove (drop) from the chosen course(s).
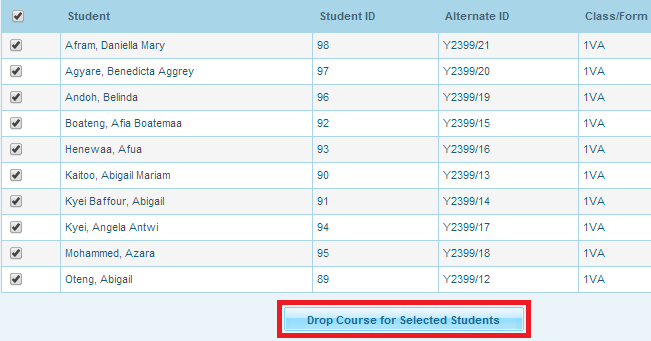
11. Select the students you want to remove (drop) the selected course(s) in the grid below.
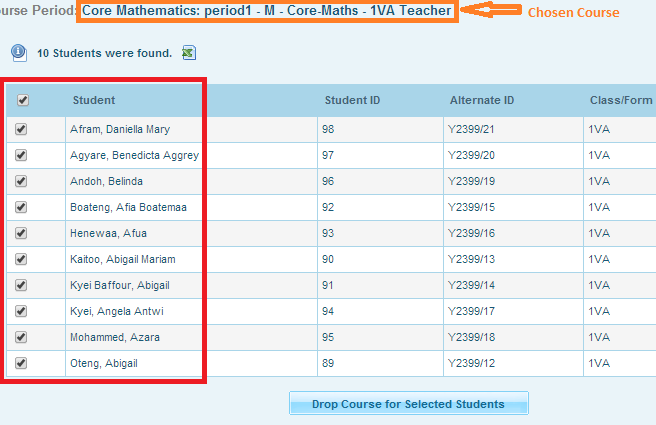
12. Click the “Drop Course for Selected Students” button.
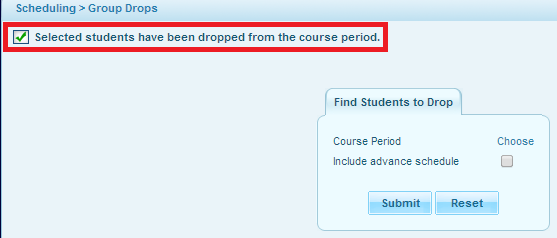
13. A confirmation screen will appear telling you “Selected students have been dropped from the course period”.
Note: If there are no schedules for the selected students and course(s), the scheduler will show the message below.
7.7 Report
7.7.1 Print Schedules
This report allows you to print schedules for any number of students.
You can search for students who requested or are enrolled in a specific course by clicking the “Choose” link next to the “Request” and “Course” search options respectively and choosing a course from the popup window that appears.
Also, you can choose to print the schedules with mailing labels. The schedules will have mailing labels positioned in such a way as to be visible in a windowed envelope when the sheet is folded in thirds. More than one schedule may be printed per student if the student has guardians residing at more than one address.
7.7.2 Print Class List
This page allows you to print list of students in a class with schedule. Students without schedule will not appear in this report. You can print for a particular period, programme or teacher depending on your criteria.
To Print Class List
- Go to schedule –> Reports –> Print Class List
- Perform your search and click on the “Submit” button (e.g. in the Programme selection box select Visual Arts).
- On the screen that comes next, You have the option to determine what information to show on the class list report. Select the information you want to show on the report from the left pane of the screen. Note: the report will be generated in the same order as your selection.
- Select at least one course period from the right pane of the screen.
- Click on “Create Class List for selected Course Periods” to generate your report

7.7.3 Print Class Pictures
This tab allows you to print the class pictures. Students without schedule will not appear in this report. You can print for a particular period, programme or teacher depending on your criteria.
- Go to schedule –> Reports –> Print Class Pictures
- Perform your search and click on the “Submit” button (e.g. in the Programme selection box select Visual Arts).
- On the screen that comes next, You have the option to determine whether you want to include the course teacher’s picture, the size of the pictures and also to print the previous years picture if current year’s picture is not available.
- Select the list of students you want to print their class picture.
- Click on “Create Class Picture for selected Course Periods” to generate your Class Picture report
7.8 Setup
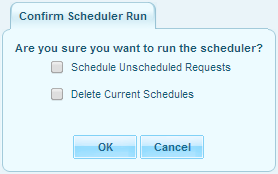
7.81 Run Scheduler
This utility schedules every student at your school according to the requests entered for them.
You first must confirm the Scheduler run.
Once the scheduler has run, which could take several minutes, it will notify you of any conflicts. The Scheduler output will also tell you if any course requested has zero available seats. If a request could not be met, you can change the requests accordingly to ensure complete scheduling. Once the schedules have been saved, you will be given the option to view the Schedule Report.
The “Delete Current Schedule” deletes all the currently assigned schedules.